Note: This is a compilation of three blog posts I wrote in 2015 that I am putting into one post. All pictures from the other posts are now in this updated last blog post on this subject. This is my first tutorial and I've got more on the way. See ya, soon.
Phase 1

Hello everyone,
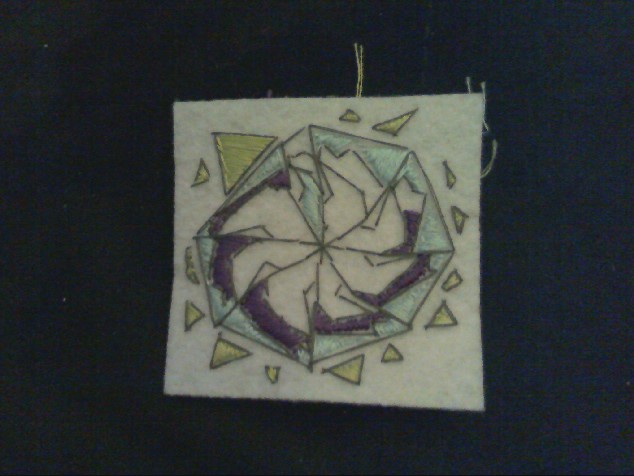
Here are some pictures of my progress on one of my hand sewn mandalas. I started it a couple of days ago. I've enjoyed working on it, yet it is in the middle now...
and it's dragging a little which is to be expected. There is a lot more that needs to be stitched to make the design complete.
I'm using 4 colors right now and am thinking of adding a couple more. I'm keeping it as an analogous color scheme from the color wheel. Green, Blue, and Purple. I may add a complement of one of these colors as well. I have also used a neutral gray for the sketched outline. It is actually sketched in thread, free hand. I did not draw any lines.
It's my first attempt, so it's a bit uneven. I'm turning it around though. I have a surprise in store on this mandala which I won't reveal until it is finished. I will have more progress on Friday of this piece. On the Monday after, I will have the finished piece with information on how I've framed it. And also a general tutorial of how I created it.

-Stiff felt, the kind from the craft store. It's cheap and it's made from recycled plastic. I like the felt because I can just hold it and I don't have to put it in an embroidery hoop.
-A medium size sharp embroidery needle. Make sure you use one from packages that say "embroidery" because they are sharp and will go through the felt better then a blunt tipped needle.
-Cotton Embroidery Floss. I use DMC. It comes in so many colors and the price is good on it. It's good for practice, and is good enough for professional work in my opinion.
Phase 2
I've been working away on my Mandala and since it is imperfect, and no that was not intentional, I decided to just go with it and see what happens.
Here is my result so far.
 |
| Satin Stitch Fills in the Shapes of the Mandala. Text is also added. |
I know this is wrong. I know you are supposed to put two threads in the needle with a short tail at the beginning so that there is a more even, relaxed tension and you can also take the thread out if there are mistakes. If the thread is folded on the needle completely, then you must cut the thread and pull it free from the other side to remove the mistaken stitch.
This is practice. I'm learning as I go on this. One thing I forgot to mention in the other post is that I started stitching from the center out and I replicated the shapes around in a circle. I will have more on this on Monday. I plan to have this done by then. Also, I will be able to show you the piece framed. I won't have a tutorial yet on how to make one because I want to start a fresh one, perhaps with a theme more relevant to the holidays and I'll be able to demonstrate it. I may post more frequently next week per day. Wednesdays, I like to have something different, recipes, travels around town, etc. Something other then crafting.
I hope that this inspires you to try embroidery. I know I don't have pictures about stitching yet, but I will next week.
Phase 3
I was working on this piece the last couple of days and how I finished it is a surprise to me. Here is the final work I title "Letting Go of 'Where's Mine?'"
As you can see, I have completely covered the letters that were in the bubble with two colors. To the right is a scar in the upper right corner.
 |
| Blacked Out Text due to letting go of anger and jealousy. |
After finishing this piece, I have come to a conclusion. I am done with feeling left out. I am done with feeling like an outcast. I am done feeling hurt over the past. I am healed.
This was not an easy piece to do at the end. It took a lot of digging deep and just working to get it done. On Friday, I will have the final framing of the piece and it will be hanging on the wall where I like to do my crocheting. I crochet as well, but sewing is my absolute favorite.
Anyway, I hope this inspires you to try something new. In the future, I will have tutorials on how to do this. I need to find an accessible method to teach how I did this. I know I can come up with something that makes perfect sense in an imperfect world.
Have a good one,
Sketchwriterjess
 |
| Framed Embroidery with Crocheted Yarn. |
 |
| Back of Framed Embroidery made with Nylon Tulle. |
P.S. Here is the back of the piece with a crocheted frame.
Comments
Post a Comment