Calling all Jewelry Makers:
I recently went to a Flamenco show in West Palm Beach in South East Florida. It was wonderful. I thought what better way to capture the night then make some paper beads from the theater programs of Playbill to use to make jewelry.
And, I also wanted a keychain bracelet. I was always digging around in my purse for the keys and it seemed like a fight to get them out of the pocket even with a keychain on it. When I first moved down here, I lived in a rental condo and they gave us keys on a keychain bracelet made from phone chord. I fell in love with the idea instantly.
So why not put these two things together right? I think lots of people could use a keychain bracelet. I knew someone who was late to an appointment because her keys fell in the trunk of her car as she was lifting her paper stack out of it. She was an hour late. She could have used one I’m sure. We’ve all been in situations like that, right?
I’m making a three part series that shows how to make a stretchy keychain bracelet; the first post shows you how to make the paper beads. The second part shows you how to make the wire findings for the keychain part of the bracelet. The third part shows you how to select beads and string them together, plus how to finish the bracelet.
Full disclosure, I am writing a book that shows all of these techniques to make the keychain bracelet with extra content. I am including more pictures and detailed advanced instruction for the different components such as bead stringing, charm bead choices, and sizing information for the making the length you want for the bracelet to fit right.
How does that sound? Sounds good, right? Stay tuned for the preview of this series to get a sneak peak at what materials and techniques will be up for use in this set of tutorials.

The Keychain Bracelet
This bracelet is inspired for sure. The beads are lightweight, yet bold and strong and the gold wire makes it look fancy. I’ve also used lightweight stones as well. It feels good to wear. It’s amazing that something that drapes on the wrist isn’t heavy. This is important since keys are.This bracelet holds a lot of keys. 8 is the maximum. And there is a removable key chain charm so you can add an extra key if you want.
Also, it’s nice to have this bracelet along for the ride. I remember the vibrant performance like it was yesterday each time I pick it up and use it. I feel like my confidence and energy renews just by thinking of such a great show.
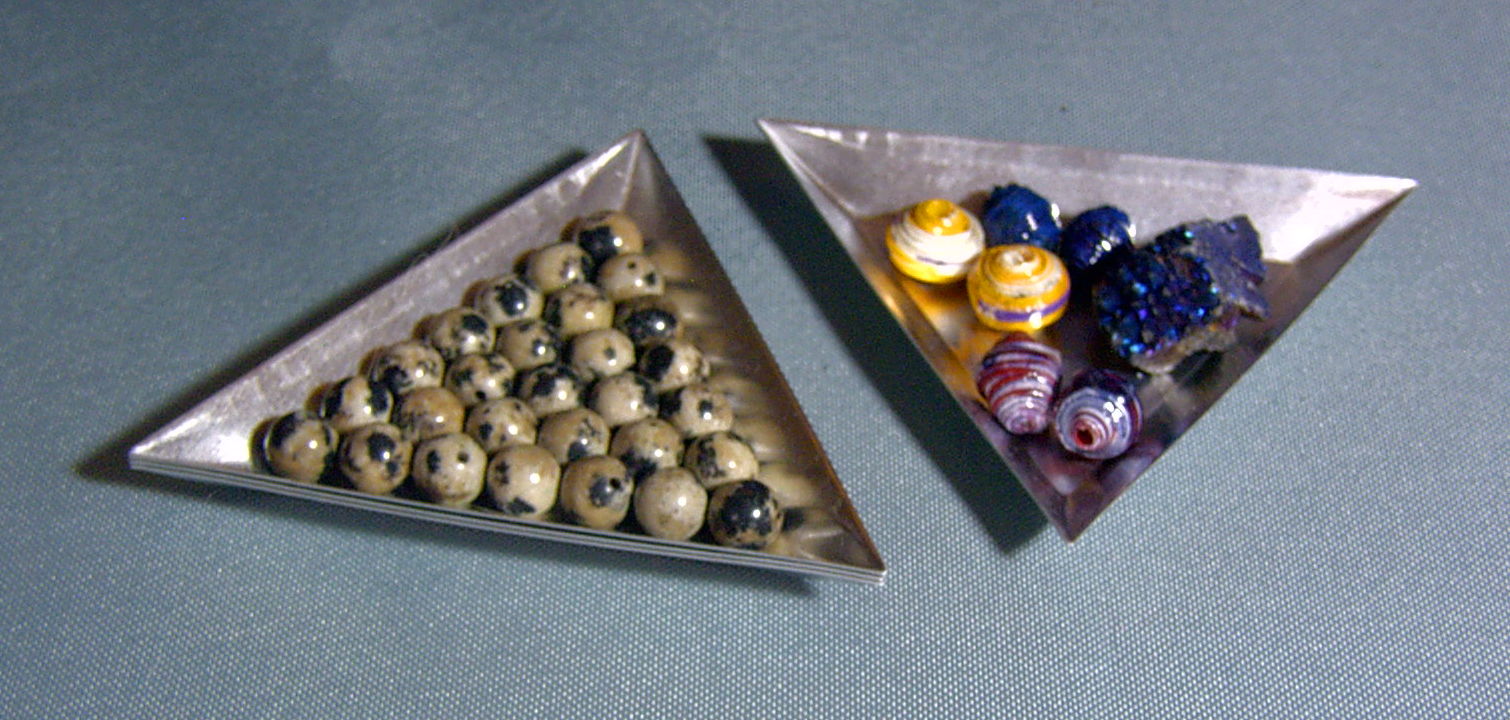
Types of beads and string used
There are two types of beads to make the bracelet, stone beads and paper beads. The stone beads are round and made from Dalmatian Jasper and the paper beads I make from cardstock and paper from the Playbill. Some of the beads I stain with watercolor to give them an extra depth of color. The yellow ones are just the paper that I glaze with Triple Thick.The paper beads take a few days to make. I wait 24 hours between each coat of wet media. I use water and glue, watercolor, and Triple Thick glaze as a finish. There are some other tools I use to make them which will be in the paper bead tutorial.
I used the stone and paper beads because they are lightweight and will be able to hold up to lots of use and abuse. They’ll be in your purse with other items and they will swing from where the key goes into the ignition.
I string them on heavyweight plastic stretchy elastic made for jewelry making.

Findings and Key Rings
The Key Ring hangs from a handmade split ring. I wanted to add some handmade hardware to this jewelry and I also wanted it to be the size, color, and material I wanted. I used gold colored copper that looks like brass. As for the key ring, that is manufactured. I think when one is going to use a keychain; the key ring needs to hold up to the weight of the keys.
Its surprising that my split ring can hold it. I’ve found a way to make it strong. It not only involves bending the wire into the shape I need, it also involves hammering the link to make it strong.

Keychain Charm
The last component to this bracelet is optional. It is a key chain charm. I find this useful for putting on my car key set so that I can take my car keys off if I need too, like for valet parking for instance. They had that at the theater too and it was so well set up. It was great.I’ve used the same wire for the charm that I used for the split ring. And I added a Druzy Quartz that I got at a craft store near me on sale. I couldn’t believe it when I found a whole bunch of them in different colors.
Putting it all together

Making this keychain bracelet is a 3 step process:
- Make the beads.
- Make the findings, the split ring and wire charm.
- Setup the beads into a pattern for stringing and gather the findings to start the process of making the bracelet.
If you want to see a post that gives you a look at a version of this bracelet assembly to prepare yourself for making this one, check out this post:
Why Your Elastic Bracelet Breaks and How to Prevent it From Happening Again.
I hope this has you thinking of the things that have given you the best memories and also how to make something practical for everyday use.
It’s nice to think of good things while driving.
I hope you are looking forward to this set of tutorials. I’m going to post every one and a half weeks, maybe a little sooner, but as most people say, 3-5 business days. I say more like 7-10 days.
If you think this sounds cool, share it with your friends on social media and bookmark it as a reminder of what will be up next.
Take Care and Safe Driving,
Jess aka Sketchwriterjess

Have You Ever Locked Your Keys In The Trunk? Here’s What to Make So It Never Happens Again!
Copyright 2019 Jessica B. Hensley
If this sounds good to you, I've got the first part of the series on making the paper beads for the keychain bracelet here:
Paper Beads, As You Wish (Jewelry Crafts Tutorial)
Paper Beads, As You Wish (Jewelry Crafts Tutorial)
Comments
Post a Comment